Hi and welcome to my second post for this month's Scrappy Chat Designs kit. This kit features some gorgeous October Afternoon papers. To show how versatile these papers are I thought I'd make a page that is about as far from the usual October Afternoon feel as you can get. My page is about Bali!
It's always hard to show a double page online so here are plenty of close ups:
Aren't those Tinby Metallic Melts divine? If you're a member you'll get full instructions on how I made this.
I had so much fun playing with the stencil, Distress Stain and Metallic Melts from the kit on this one.
If you're a Scrappy Chat Designs member then you will be emailed instructions on how I made this. As a member you get heaps of info every month showing techniques, tips and hints as well as a minimum of three videos showing how to make the key three layouts from each kit. Contact orders.scrappychatdesigns.gmail.com.for more info.
Happy Scrappin'!
Heather
Thursday, 7 August 2014
Thursday, 31 July 2014
My Scrappy Mess
Hello everyone and welcome to the first of my posts using the new "Explore" kit from Scrappy Chat Designs. This has to be favourite kit of mine. It would be a worry if it wasn't cos I picked the papers for it - lol!
These October Afternoon papers are gorgeous. Even though October Afternoon papers look fabulous in their own right, I find they work really well on my pages. The layouts I make with them are usually not vintage or retro themed, as the papers would seem to dictate. I find they work well with all sorts of layout styles.
Here's what I mean:
The kit comes with a fabulous Crafter's Workshop stencil, some Distress Stain, Tinby Metallic Melts, cardstock, twine and enamel dots. I've only used two of these products plus the paper on this layout. I can't wait to show you what else I've made!
For those of you who are Scrappy Chat Designs members, a step by step process of how I made the background will be emailed to you. For those of you who aren't members take a look here to see if this might work for you. You get kits, instructions and videos delivered each month to your door or your inbox. How easy is that?
Happy scrappin'!
Heather
These October Afternoon papers are gorgeous. Even though October Afternoon papers look fabulous in their own right, I find they work really well on my pages. The layouts I make with them are usually not vintage or retro themed, as the papers would seem to dictate. I find they work well with all sorts of layout styles.
Here's what I mean:
There's nothing retro about this layout. It's about as modern as you can get!
Don't you just love the title? I found it on one of the sheets of paper. As soon as I saw it I knew I had to use it! I can see so many scrappers relating to it! Here's a closie:
The kit comes with a fabulous Crafter's Workshop stencil, some Distress Stain, Tinby Metallic Melts, cardstock, twine and enamel dots. I've only used two of these products plus the paper on this layout. I can't wait to show you what else I've made!
For those of you who are Scrappy Chat Designs members, a step by step process of how I made the background will be emailed to you. For those of you who aren't members take a look here to see if this might work for you. You get kits, instructions and videos delivered each month to your door or your inbox. How easy is that?
Happy scrappin'!
Heather
Sunday, 27 July 2014
Once Upon A Time
Hi There !!
Sandra here sharing with you a layout I created using this months awesome
Explore kit.
I know I say it every month, but this kit is awesome.
I saw the papers and I just knew I had to scrap a layout of my 2 Grandsons.
I know I say it every month, but this kit is awesome.
I saw the papers and I just knew I had to scrap a layout of my 2 Grandsons.
I love the vintage tones of the papers I have used.. but also love that the kit is so versatile that they can also be given a modern style ( I have seen some sneak peaks of what the other girls have created with the kit and all I can say is that you are in for a real treat!! )
and a close up ;-)
Would you like to learn the techniques behind this layout? Full techniques and more detail pictures are shared with our kit members, so consider signing up to learn how to use many products in different ways. Membership is $135 for 3 months of kits including postage and mailed out each month to you. Not only do you get 3 videos and instructions for the 3 layouts that can be created with the kit products learning lots of techniques in the process - you also will receive e-mail technique sheets from the Arty Chic's!
e-mail us at orders.scrappychatdesigns@gmail.com
Thanks for stopping by
Thursday, 24 July 2014
Explore kit
Ok, so Beck couldn't stay away for long so here is another kit by her.
Head on over to the website www.scrappychatdesigns.com.au to purchase this and other kits amongst other fun products!
For this month's kit release we have another super fun kit!
Spellbinders dies have been used in the creation of the layouts, and whilst not included in the kit, are very easily adapted patterns for those that do not own a die cutting machine. Dies can be purchased with your kit, so advise if you are interested in these when ordering. Dies used in this kit are the the new Build a Tags two set as well as the Rosettes.
Beck will take you through using the product in the kit in interesting and unusual ways including some fun watercolour techniques. So get your texture paste, VersaMark ink and willingness to get your hands dirty as you create three different layouts with the help of THREE videos. You are sure to nail all the techniques for each layout that don't have a view by date - you get to watch them forever if you wish!
Kits are still $39 + Postage with LOADS of value for you money, as it is like doing 3 classes - all in the comfort of your own home!
Here is some more information for those wanting a to know little more information about our kits.
Head on over to the website www.scrappychatdesigns.com.au to purchase this and other kits amongst other fun products!
For this month's kit release we have another super fun kit!
This kit features some cool less consumable product and filled with LOADS of techniques to learn! All teamed up with new release October Afternoon papers. Aside from the pattern paper there is plenty of Cardstock, a new The Crafter's Workshop stencil, Tinby Designs Metallic melts in Pixie Gold (you can only get that colour by purchasing this kit) Tim Holts Distress stain and twine and My Mind's Eye Enamel dots. As you can see this kit is jam packed with product for you to learn and get creative with and Beck sure shows you how!
Spellbinders dies have been used in the creation of the layouts, and whilst not included in the kit, are very easily adapted patterns for those that do not own a die cutting machine. Dies can be purchased with your kit, so advise if you are interested in these when ordering. Dies used in this kit are the the new Build a Tags two set as well as the Rosettes.
Beck will take you through using the product in the kit in interesting and unusual ways including some fun watercolour techniques. So get your texture paste, VersaMark ink and willingness to get your hands dirty as you create three different layouts with the help of THREE videos. You are sure to nail all the techniques for each layout that don't have a view by date - you get to watch them forever if you wish!
Kits are still $39 + Postage with LOADS of value for you money, as it is like doing 3 classes - all in the comfort of your own home!
Here is some more information for those wanting a to know little more information about our kits.
They are self-paced class kits to complete in the comfort of your own home
or with a group of friends
Each month there will be LOADS of added inspiration with one of the designers creating 3 layouts of their own style with the kit, and to not leave it there the other two ladies will be sharing some added techniques using the product in the kit, so you can learn more and more!
Each premier kit comes with:
- Video AND instructions to complete the three layouts
- Feature a many techniques with product to be
used well after the life of the kit.
(With all of our kits you will have plenty of product and knowledge
to add to future projects)
- Photos of each project including close up detail
pictures
- All the product needed to complete the project with a list of additional basic items used such as ink/ paints/gesso/texture paste and colour sprays you will need out of your supplies.
The kits focus on how to use various products teamed up with some pretty paper to compliment them, so there is always less or non-consumable products in our kits, to not
only help you complete some beautiful projects, learn many techniques
and ways of using the different product as well as taking them well beyond the kit projects.
Kits are $39 + postage and come out monthly
To order visit our website www.scrappychatdesigns.com.au
Scrappy Chat Designs Kit club Membership (e-mail us to purchase):
This lasts for 3 months is $135 and includes 3
kits at 5% off and postage for all 3 kits (they are released monthly). As a
member you also get ‘insider’ info on what is coming up in the next kit –
sometimes even a pic! You are also
guaranteed the kits which do sometimes sell out VERY quickly. If you are interested in membership, you need
to pay the membership fee by the 30th of the month prior. So to commence in August (next kit to be released) you need to have your
membership fee paid by 30th July.
Current Kit stocks:
Check out our website for up to date information in kits available. You can search for kits only by heading to the 'Products' page and selecting 'kits' from the search bar on the left.
Sunday, 6 July 2014
Tickled Pink
Hi ho.
I've had a lot of fun working with the new kit from Scrappy Chat Designs. I've been very surprised with what I came up with for this one - because I opted to use the pink! I rarely scrap with pink and I'm so glad I did this time cos I love it!
Here's the layout:
Although I could have chosen from any of the colours in the kit, I really only ended up using three colours in this - teal, grey/silver and pink. I love how they go together so well. I never would have thought that pink would suit photos about the Australian bush but I've changed my mind now!
I cut down the large chipboard shape and used the silver Metallic Melts on it to make the framework under the photo.
Everything on this layout came with the kit, except for the string. There are an amazing three stamps in this kit and I used them all. They're my new faves!
If you're a Scrappy Chat Designs member then you will be emailed instructions on how I made the background and the butterfly stamped section and how I altered the letters. As a member you get heaps of info every month showing techniques, tips and hints as well as a minimum of three videos showing how to make the key three layouts from each kit. Contact orders.scrappychatdesigns.gmail.com.for more info.
Happy scrappin'!
Heather
I've had a lot of fun working with the new kit from Scrappy Chat Designs. I've been very surprised with what I came up with for this one - because I opted to use the pink! I rarely scrap with pink and I'm so glad I did this time cos I love it!
Here's the layout:
I cut down the large chipboard shape and used the silver Metallic Melts on it to make the framework under the photo.
If you're a Scrappy Chat Designs member then you will be emailed instructions on how I made the background and the butterfly stamped section and how I altered the letters. As a member you get heaps of info every month showing techniques, tips and hints as well as a minimum of three videos showing how to make the key three layouts from each kit. Contact orders.scrappychatdesigns.gmail.com.for more info.
Happy scrappin'!
Heather
Thursday, 3 July 2014
If You Can Dream It.......
Hello There!
Sandra here again with my third layout using the stunning Dreams Imagined kit.
The colours are so pretty in this kit and I just had to go with flowers for this layout.
I used the flowers that came in the kit and Spellbinders Itty Blossom Dies to create the others using the left over papers from the kit.
I stamped the back of the cute birdy buttons with the ledger stamp in the kit... so cute!
I used bits of the left over chipboard and stamped and fussy cut the butterflies using the divine stamp in the kit..then I coloured them in with watercolour pencils.
Such a fun kit which can be used for both boys and girls layouts.... not to mention cards!!
Thursday, 26 June 2014
The Geek.
Hi!
Sandra here with my second share with you using the Dreams Imagined kit
I had a bit of a play with this one and just had fun with it.
I placed some of the Kaisercraft number alphas onto the page,
sprayed some black spray onto an acrylic block and just "whacked" it onto the alphas.
My goodness you should see the mess under the photo! lol
The "blobs" did end up being more solid than I anticipated so I added some stamping and a few sprays here and there.. and ended up with an even bigger mess!!! But I kinda liked it.
Once dried I peeled the alpha stickers off, leaving a cool mask.
.
I made the glasses from the black card that comes in the kit.
I used a paper piecing template I found online.
(Scrapbook Etc)
(the white bit is double sided tape.. without taking the protective side off, it matched the insulation tape used on the real glassed perfectly.)
I used a paper piecing template I found online.
(Scrapbook Etc)
(the white bit is double sided tape.. without taking the protective side off, it matched the insulation tape used on the real glassed perfectly.)
Sometimes even the barcodes from the papers are a perfect touch.. plus a bulldog clip I nicked from my husbands office... shhhh!! ;-)
and the finishing touch were some of the diamonds which I had already sprayed white from my first layout. Too easy!
And there it is .. my second layout.
I'll see you soon with my third layout... hmmmm.... might go a bit "prettier" with the next one. .. using the flowers in the kit.. and maybe making my own. ;-)
Thursday, 19 June 2014
Dreams Imagined, 25yrs.
Hello
Sandra here again!
How awesome is the Dreams Imagined Kit?
Sandra here again!
How awesome is the Dreams Imagined Kit?
I fell in love
with it as soon as I opened my happy mail from Beck, the colours are just divine.
For
my first layout I went for quite a simple look.
I had some fun with the background and tried something a little different with the awesome piece of Twiddleybitz lattice chipboard
Here is how I
created it.
Firstly I trimmed the grey cardstock to 29.5cm x29.5cm.
I cut out the centre of the IMAGINE paper and used this to matt the grey cardstock.
Firstly I trimmed the grey cardstock to 29.5cm x29.5cm.
I cut out the centre of the IMAGINE paper and used this to matt the grey cardstock.
Using the Kaisercraft stamps I first randomly
stamped the edges and the layout with white ink.
and then I repeated this with black ink.
I added some white, orange and aqua watered down water colours splats to add a bit of colour to the background... they look awesome against the grey!
and then I repeated this with black ink.
I added some white, orange and aqua watered down water colours splats to add a bit of colour to the background... they look awesome against the grey!
Next
I created the chipboard flower.
I painted the entire chipboard piece with white matte spray paint.
(you
can use which ever medium you like.. I am an impatient person and I find that
spray paint gives great coverage and is also fast drying )
Then.....
Then.....
1.
Cut out your 5 diamonds from the lattice (I only
used 5 because I knew that the flower would be tucked under the photo.. but to
make a complete flower cut out 6 diamonds.
2. Glue the diamonds onto the piece of Imagine paper that you cut out earlier.
3. Fussy cut around the your flower.
4. I found a plain white button in my stash and
embossed it using the silver TINBY
METALLIC MELTS in the kit.
I then assembled
the layout as seen in the photo.
To help the title stand out I outlined it with white gel pen
Next
I created the butterflies.
I simply used the gorgeous butterfly stamp that is in the kit with Staz on Ink and stamped it on the piece of white card in the kit.
then...
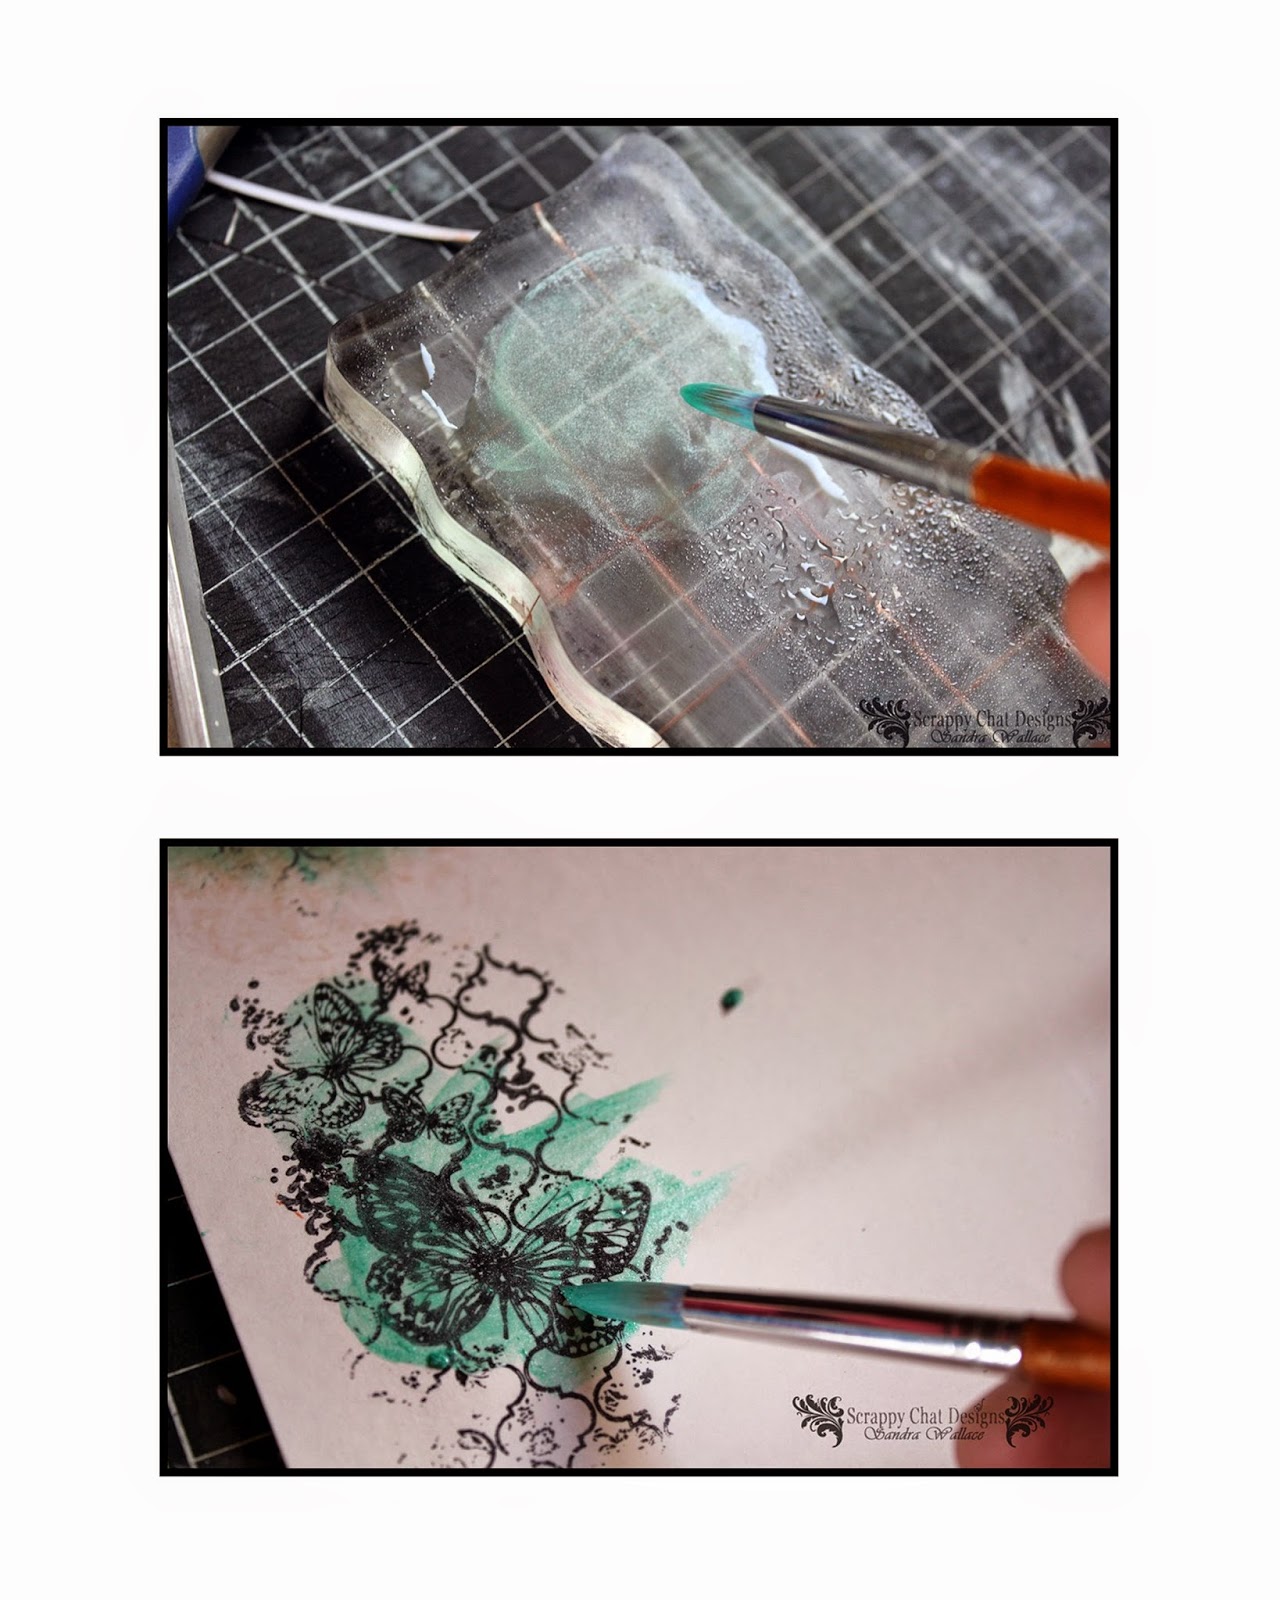
On
an acrylic block I added some mint gelato and then sprayed it with water. I
blended it with a paintbrush and then simply painted the stamped image,
blotting any excess water with a baby wipe.
Then I fussy cut the butterflies and added them to my layout.
Added
some journaling ...
And
my layout is complete!
I hope you have
fun creating with your new Dreams Imagined Kit.
And I do hope you share what YOU create with us over on the ScrappyChat Facebook page.
We love to see what the members create using the kits!
And I do hope you share what YOU create with us over on the ScrappyChat Facebook page.
We love to see what the members create using the kits!
Sunday, 15 June 2014
Cheeky Smiles kit left overs!
Oh how I enjoyed creating extra projects with the leftovers from the Cheeky Smiles kit, there was definitely lots of yummy paper in there.
Beck here and today I wanted to share with you a layout I created for Spellbinders using some left over paper from the kit. The spray in the kit could even be used for the splatter (I couldn't find mine at the time so had to use an alternative). Here is a sneak:
If you would like to see the layout and how it came together head on over to the blog. I would LOVE you to leave some comments there on a layout you could use this cute die on and let me know what you think of it :D Click here for post
Hope you are enjoying creating with the Cheeky Smiles kit and if not... what are you waiting for? Head on over to the online store to order yours today! (link top right hand corner of the blog)
Beck here and today I wanted to share with you a layout I created for Spellbinders using some left over paper from the kit. The spray in the kit could even be used for the splatter (I couldn't find mine at the time so had to use an alternative). Here is a sneak:
If you would like to see the layout and how it came together head on over to the blog. I would LOVE you to leave some comments there on a layout you could use this cute die on and let me know what you think of it :D Click here for post
Hope you are enjoying creating with the Cheeky Smiles kit and if not... what are you waiting for? Head on over to the online store to order yours today! (link top right hand corner of the blog)
Thursday, 12 June 2014
Dreams Imagined kit release
Our first kit by Fiona Paltridge is here! How very exciting!
Head on over to the website www.scrappychatdesigns.com.au to purchase this and other kits amongst other fun products!
For this month's kit release we have a super fun kit!
Spellbinders dies have been used in the creation of the layouts, and whilst not included in the kit, are very easily adapted patterns for those that do not own a die cutting machine. Dies can be purchased with your kit, so advise if you are interested in these when ordering. Dies used in this kit are the flutters set and lacey squares.
Fiona will take you through using the product in the kit in interesting and unusual ways including some fun watercolour techniques. So get your sprays, texture paste and willingness to get your hands dirty as you learn lots of different ways to create interesting backgrounds with the help of THREE videos. You are sure to nail all the techniques for each layout that don't have a view by date - you get to watch them forever if you wish!
Kits are still $39 + Postage with LOADS of value for you money, as it is like doing 3 classes - all in the comfort of your own home!
Here is some more information for those wanting a to know little more information about our kits.
Head on over to the website www.scrappychatdesigns.com.au to purchase this and other kits amongst other fun products!
For this month's kit release we have a super fun kit!
This kit features some cool less consumable product and filled with LOADS of techniques to learn! All teamed up with new release Kaisercraft papers. Aside from the pattern paper there is Cardstock, a 12 x 12 inch Twiddleybitz chipboard fram, full set of sticker alphas, two texture background stamps, the flowers, Metallic Melts, and some of the cutest bird buttons. As you can see this kit is jam packed with product for you to learn and get creative with!
Spellbinders dies have been used in the creation of the layouts, and whilst not included in the kit, are very easily adapted patterns for those that do not own a die cutting machine. Dies can be purchased with your kit, so advise if you are interested in these when ordering. Dies used in this kit are the flutters set and lacey squares.
Fiona will take you through using the product in the kit in interesting and unusual ways including some fun watercolour techniques. So get your sprays, texture paste and willingness to get your hands dirty as you learn lots of different ways to create interesting backgrounds with the help of THREE videos. You are sure to nail all the techniques for each layout that don't have a view by date - you get to watch them forever if you wish!
Kits are still $39 + Postage with LOADS of value for you money, as it is like doing 3 classes - all in the comfort of your own home!
Here is some more information for those wanting a to know little more information about our kits.
They are self-paced class kits to complete in the comfort of your own home
or with a group of friends
Each month there will be LOADS of added inspiration with one of the designers creating 3 layouts of their own style with the kit, and to not leave it there the other two ladies will be sharing some added techniques using the product in the kit, so you can learn more and more!
Each premier kit comes with:
- Video AND instructions to complete the three layouts
- Feature a many techniques with product to be
used well after the life of the kit.
(With all of our kits you will have plenty of product and knowledge
to add to future projects)
- Photos of each project including close up detail
pictures
- All the product needed to complete the project with a list of additional basic items used such as ink/ paints/gesso/texture paste and colour sprays you will need out of your supplies.
The kits focus on how to use various products teamed up with some pretty paper to compliment them, so there is always less or non-consumable products in our kits, to not
only help you complete some beautiful projects, learn many techniques
and ways of using the different product as well as taking them well beyond the kit projects.
Kits are $39 + postage and come out monthly
To order visit our website www.scrappychatdesigns.com.au
Scrappy Chat Designs Kit club Membership (e-mail us to purchase):
This lasts for 3 months is $135 and includes 3
kits at 5% off and postage for all 3 kits (they are released monthly). As a
member you also get ‘insider’ info on what is coming up in the next kit –
sometimes even a pic! You are also
guaranteed the kits which do sometimes sell out VERY quickly. If you are interested in membership, you need
to pay the membership fee by the 30th of the month prior. So to commence in July (next kit to be released) you need to have your
membership fee paid by 30th June.
Current Kit stocks:
Check out our website for up to date information in kits available. You can search for kits only by heading to the 'Products' page and selecting 'kits' from the search bar on the left.
Thursday, 5 June 2014
Rockin' With Elvis
Hi there.
It's Heather back with you again today with my third layout for Scrappy Chat Design's Cheeky Smiles Kit. I have now made three layouts but I could easily make another three. There are so many papers in this kit!
Here's my layout:
This is very much a light-hearted, fun layout. I love making these. I just go with what feels right.
The background is from the gorgeous Simple Stories DIY Boutique range that is in this month's kit. I framed the photo with the Boutique Newspaper paper then I punched circles and cut strips and chevrons from other papers in the kit to back it all.
Underneath the papers, I just gave a good spray with a white mist then added a small spray of the Tumble Dye from the kit. At the end, I covered the photo and flicked the Tumble Dye across the page. I added the enamel dots from the kit too.
Did you notice what I put under the photo? Yep, they're Bandz, or Loom Bands or whatever brand you want to call them . These were in the kit too! I love how there are sometimes unusual items like this that make me think outside the square!
I thought I'd try a different approach to making my title. First I sprayed with white mist. When it was completely dry, I adhered the words "Elvis " and "me" in place using temporary adhesive. I then sprayed over them with the Tumble Dye. When this was dry I peeled off the chipboard letters, touched up any parts that leaked under the letters with white paint then outlined them in black pen. This created something just that little bit different.
I've really enjoyed using this month's kit and am looking forward to still playing with the rest!
Heather
www.heathermcmahon09.blogspot.com.au
It's Heather back with you again today with my third layout for Scrappy Chat Design's Cheeky Smiles Kit. I have now made three layouts but I could easily make another three. There are so many papers in this kit!
Here's my layout:
The background is from the gorgeous Simple Stories DIY Boutique range that is in this month's kit. I framed the photo with the Boutique Newspaper paper then I punched circles and cut strips and chevrons from other papers in the kit to back it all.
Underneath the papers, I just gave a good spray with a white mist then added a small spray of the Tumble Dye from the kit. At the end, I covered the photo and flicked the Tumble Dye across the page. I added the enamel dots from the kit too.
Did you notice what I put under the photo? Yep, they're Bandz, or Loom Bands or whatever brand you want to call them . These were in the kit too! I love how there are sometimes unusual items like this that make me think outside the square!
I thought I'd try a different approach to making my title. First I sprayed with white mist. When it was completely dry, I adhered the words "Elvis " and "me" in place using temporary adhesive. I then sprayed over them with the Tumble Dye. When this was dry I peeled off the chipboard letters, touched up any parts that leaked under the letters with white paint then outlined them in black pen. This created something just that little bit different.
I've really enjoyed using this month's kit and am looking forward to still playing with the rest!
Heather
www.heathermcmahon09.blogspot.com.au
Monday, 2 June 2014
Hi There !!
Sandra here sharing with you a layout I created using this months awesome
Cheeky Smiles kit.
I love how all of the Arty Chics have used this kit so differently, showing how versatile Scrappy Chat Designs kits are.
I played around with watercolour affects this time around. (it seems our new design team member, Fiona, has inspired another Arty Chic. ;-))
I used the Tumble Dye that comes with the kit and a bit of green Gelato, some water
and a piece of plastic.. such an easy technique and I loved the affect it gave!
I used the Tumble Dye that comes with the kit and a bit of green Gelato, some water
and a piece of plastic.. such an easy technique and I loved the affect it gave!
and a close up ;-)
Would you like to learn the techniques behind this layout? Full techniques and more detail pictures are shared with our kit members, so consider signing up to learn how to use many products in different ways. Membership is $135 for 3 months of kits including postage and mailed out each month to you. Not only do you get 3 videos and instructions for the 3 layouts that can be created with the kit products learning lots of techniques in the process - you also will receive e-mail technique sheets from the Arty Chic's!
e-mail us at orders.scrappychatdesigns@gmail.com if you would like to sign up for June!
Thanks for stopping by

Subscribe to:
Posts (Atom)


+wm.jpg)
+wm.jpg)

.jpg)
.jpg)


.jpg)


.jpg)